LGA 771 to 775 adapter mod: running a server Xeon in a Core 2 board
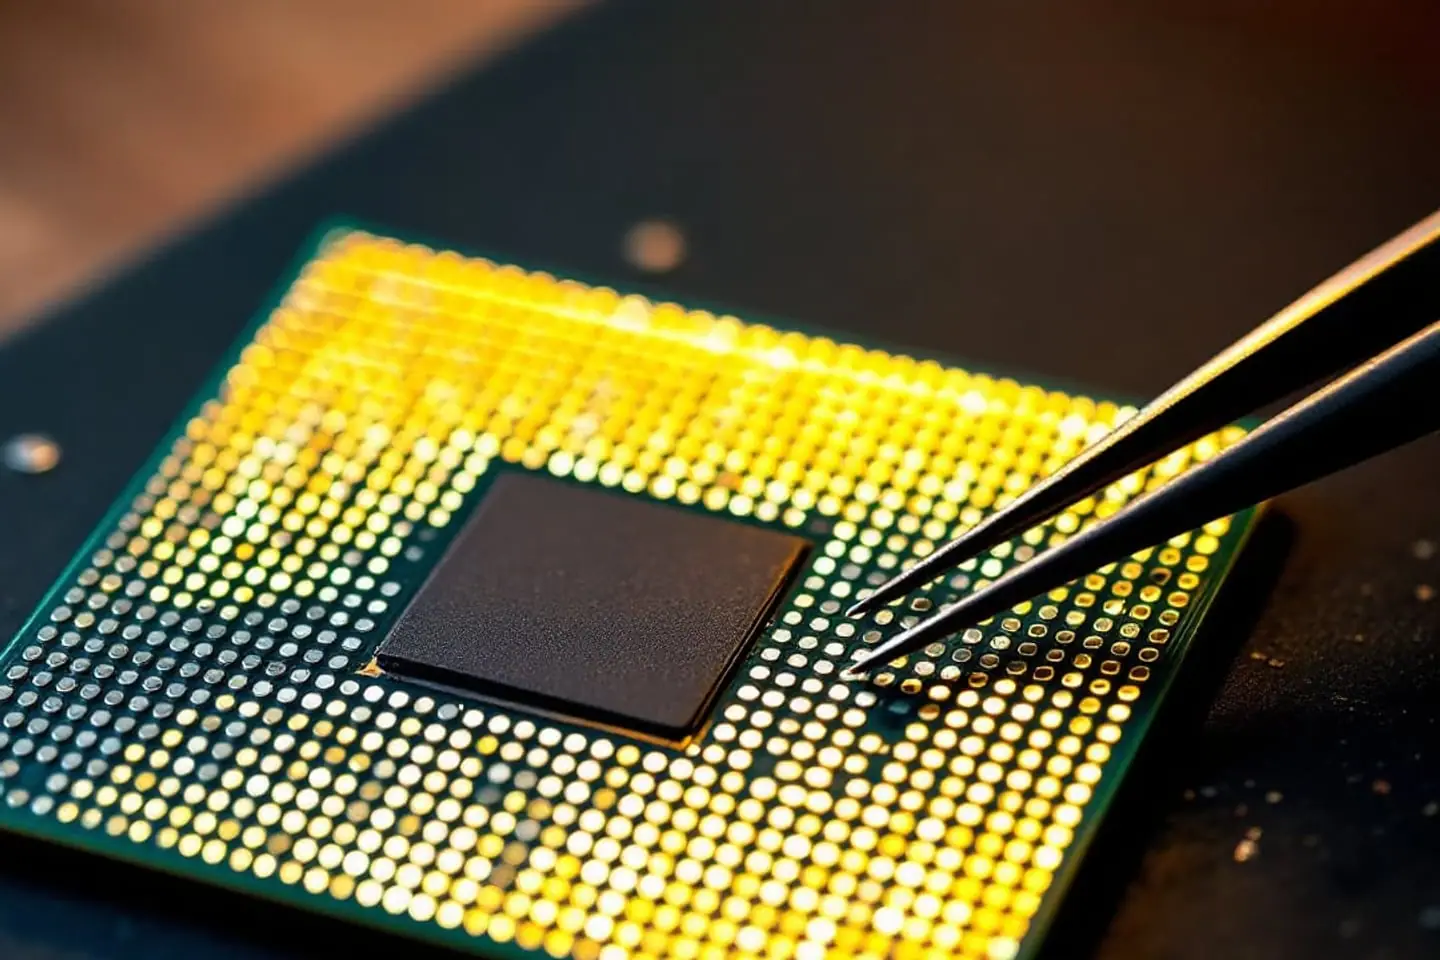
The LGA 771 to 775 mod lets a desktop motherboard built for Core 2 processors run a Xeon that was made for two-socket servers. The usual candidates are 45 nm quad-cores such as the Xeon E5450, X5460 and L5420. The hardware side of the job is small: two plastic key tabs come off the LGA 775 socket, and a thin adapter sticker goes on the underside of the Xeon. The firmware side is what decides whether the machine boots, because the board's BIOS has to recognize and support what you just dropped into it.
This first page explains why the swap is possible at all, what the sticker and the missing tabs actually do, and how the whole job fits together. The other four pages cover board compatibility, choosing a chip, the hands-on steps and troubleshooting.
Why a server chip fits a desktop board
Intel's 45 nm Core 2 generation (the Penryn family, CPUID model 23) was sold under several code names that share the same building blocks. Yorkfield is the desktop Core 2 Quad: two dual-core dies in one package, each die with 6 MB of L2 cache on the full version. Harpertown, sold as the Xeon 5400 series, is the dual-socket server version of that design. On the dual-core side, Wolfdale is the Core 2 Duo E8000 family and Wolfdale-DP, the Xeon 5200 series, is its server sibling.
That makes an E5450 and a Core 2 Quad Q9650 very close relatives: four cores, 12 MB of L2, a 1333 MT/s front side bus and a 3.00 GHz clock. The front side bus (FSB) is the shared link between the processor and the chipset. "1333 MT/s" means a bus clock of 333 MHz that moves data four times per tick, so 333 x 4 = 1,333 million transfers per second. The core clock is that 333 MHz bus clock times a fixed multiplier, and both chips use 9: 333 MHz x 9 = 3.0 GHz.
Here is how a few popular Xeons line up with the desktop chips they mirror:
| Xeon | Cores, L2 | Bus clock x multiplier | TDP | Nearest LGA 775 relative |
|---|---|---|---|---|
| E5450 | 4, 12 MB | 333 MHz x 9 = 3.00 GHz | 80 W | Core 2 Quad Q9650: same clock, bus and cache, 95 W |
| E5440 | 4, 12 MB | 333 MHz x 8.5 = 2.83 GHz | 80 W | Core 2 Quad Q9550, 95 W |
| X5460 | 4, 12 MB | 333 MHz x 9.5 = 3.16 GHz | 120 W | No desktop quad at this clock; on a 1333 bus the QX9650 (3.00 GHz, 130 W) is closest |
| L5420 | 4, 12 MB | 333 MHz x 7.5 = 2.50 GHz | 50 W | Q9450 class (2.66 GHz, 95 W) |
| X5260 | 2, 6 MB | 333 MHz x 10 = 3.33 GHz | 80 W | Core 2 Duo E8600, 65 W |
The 5400-series figures come from Intel's Xeon 5400 series specification update; the X5260's come from Wikipedia's LGA 771 processor tables. TDP (thermal design power) is the heat output, in watts, that Intel tells cooler and board designers to plan for. It is not the most the chip can ever draw, but it is the number board makers validate against.
What differs between the two families is mostly the package. LGA 771 (Socket J) was derived from LGA 775 and, as Wikipedia's LGA 771 article puts it, is almost pin compatible with it. In practice three things stand between a Xeon and a desktop board:
- The key notches on the edge of the package are in different places, so the socket's plastic tabs block the chip.
- A pair of contacts carries its signals in different positions on the two sockets.
- The Xeon identifies itself differently to the firmware, which matters for the BIOS and its microcode.
The tabs and the sticker deal with the first two. The BIOS has to deal with the third.
The two physical changes
Removing the socket key tabs
An LGA 775 socket has two small plastic tabs on its inner wall. They match two notches in the edge of every LGA 775 processor, so a chip can only go in one way round. An LGA 771 Xeon has its notches elsewhere, so with the tabs in place it sits on top of them instead of settling onto the contacts. The mod removes both tabs, usually by shaving them off flush with a sharp hobby knife.
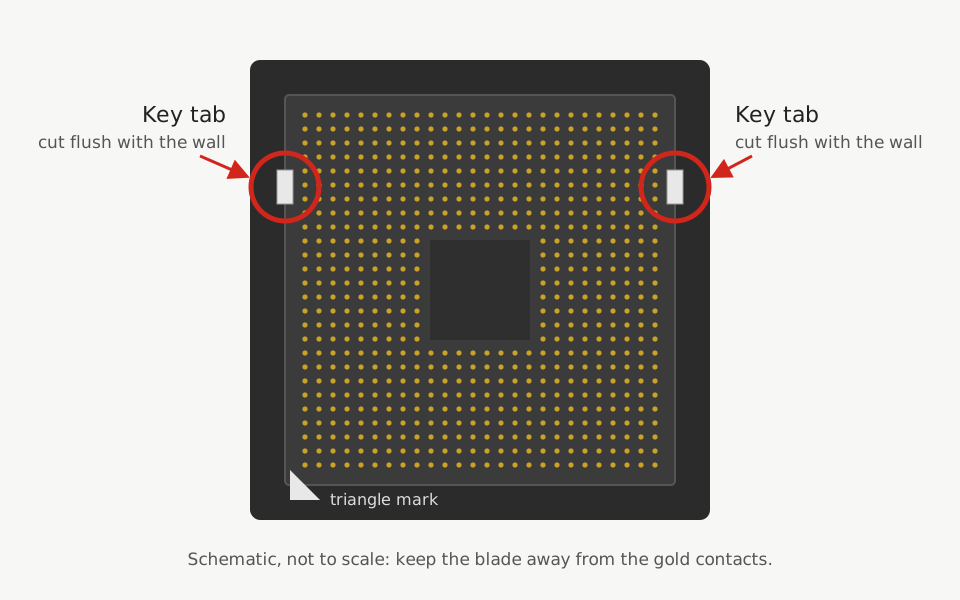
Two consequences are worth knowing before you start. The socket still accepts ordinary LGA 775 chips afterwards; it just no longer stops you from turning one the wrong way, so the gold triangle on the processor's corner becomes your only orientation guide. And the cutting happens a few millimeters above 775 spring contacts that bend if you breathe on them wrong, which is why page 4 spends real time on shielding them and checking for plastic shavings.
The adapter sticker
The adapter is a thin, die-cut flexible circuit with adhesive on one side, and it sits on the land side of the Xeon, the underside with the gold pads. Its job is narrow. It reroutes a pair of contacts so the board sees the signals it expects at those positions, and otherwise stays out of the way so the rest of the pads meet the socket as usual.
Intel never documented or supported this mod, and we have not found a primary source that names the exact lands involved, so we will not guess at them. Wikipedia credits the adapters to DIY enthusiasts in China.
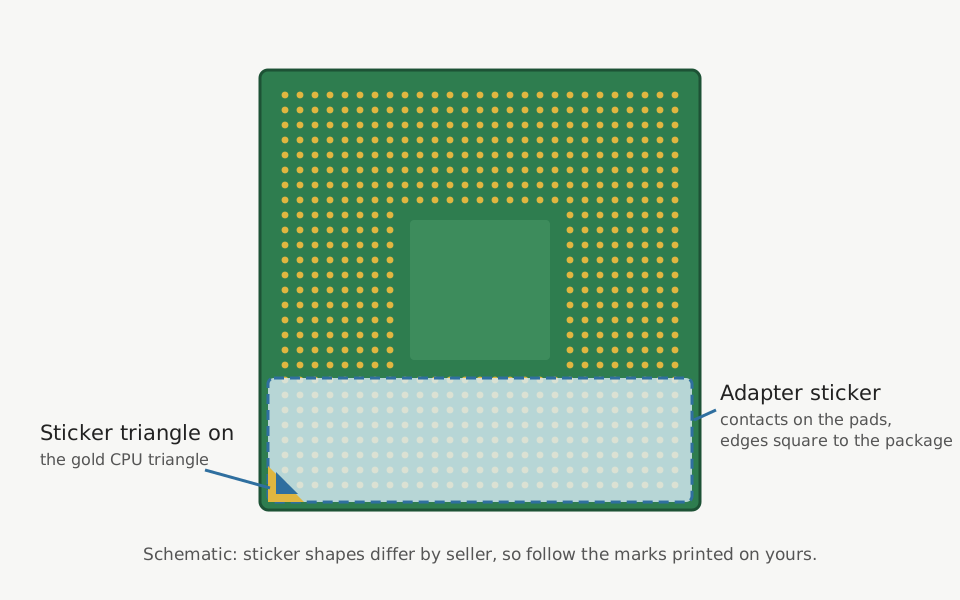
The sticker has its own triangle mark, and that mark goes to the same corner as the gold triangle printed on the processor. Placement is the fiddliest part of the whole mod, and page 4 walks through it with the edges you line up against.
The firmware half
The hardware work gets the right signals to the right contacts. Whether the chip then runs depends on two things in the BIOS.
First, the board must already support the desktop chip that shares the Xeon's core, bus speed and stepping. The stepping is the revision of the silicon, written as a letter and number such as C0 or E0; each stepping has its own CPUID signature, the identification number the processor reports to software. An E0-stepping E5450 needs a board whose CPU support list includes a 1333 MT/s, 12 MB Yorkfield of the Q9650 class. A board that tops out at 65 nm Core 2 Quads, or at a 1066 MT/s bus, is a poor host however carefully you cut the tabs. Page 2 goes through chipsets and support lists in detail.
Second, the BIOS needs the right microcode. Microcode updates are small patches that the BIOS loads into the processor at every boot to correct errata, Intel's term for known bugs in the silicon. Intel tags each update with the CPUID and the platform IDs it applies to, and LGA 771 Xeons report different platform IDs from their LGA 775 twins. A BIOS that carries only the desktop updates may have nothing that matches the Xeon. Owners report that some boards boot anyway and run the chip unpatched, while others refuse to complete POST, the power-on self-test a board runs before it starts an operating system. Our LGA 771 Xeon microcode page explains platform IDs and how to find out what your BIOS already contains.
Why people go to the trouble
Used server Xeons are common and usually inexpensive, and the chips are good ones. Every Xeon 5400 quad-core has the full 12 MB of L2, where the Core 2 Quad Q8000 and several Q9000 models have 4 or 6 MB. The low-voltage L-series parts suit quiet machines: an L5420 is rated at 50 W against 95 W for a desktop Q9450. At the other end, the X-series chips appeal to people who enjoy front side bus overclocking.
A typical case is plainer than any of that. A family PC or an office tower has a perfectly good LGA 775 board with a dual-core in it, and a modded quad-core is the biggest processor upgrade that board will ever take.
Keep expectations honest, though. This is still a 2008-era platform with the memory controller in the chipset, no SSE4.2 and no AVX, so some current software and operating systems will not run on it at all. For a fair look at the jobs such a machine still does well, see is a Core 2 Quad PC still useful?
The whole job, in order
- Identify your exact board and chipset and read its CPU support list. Page 2 explains what to look for.
- Choose a Xeon whose bus speed, TDP and stepping suit that board. Page 3 covers the families, and the LGA 771 compatibility checker gives a quick first answer from chipset and chip.
- Update the BIOS to the board maker's final release, and add Xeon microcode if it is missing.
- Remove the two socket key tabs.
- Fit the adapter sticker and seat the Xeon by its triangle.
- Clear the CMOS settings, boot, and confirm the core count, clock speed and temperatures before you trust it with anything.
Page 4 walks through steps 3 to 6. Our table of quad-core LGA 771 and LGA 775 chips is handy throughout, because it shows bus speed, cache and TDP side by side.
What this guide covers
- Page 2, motherboard compatibility: what Intel documents for each chipset, the BIOS support rule, 80 W versus 120 W parts, and OEM boards.
- Page 3, choosing a Xeon: Harpertown and Wolfdale-DP families, FSB, TDP and stepping, and a decision table from your board to a chip.
- Page 4, step-by-step instructions: the BIOS update, cutting the tabs, placing the sticker, seating the CPU and the first boot.
- Page 5, troubleshooting: no POST, unknown CPU messages, wrong core count or speed, odd temperatures and instability.
Before you buy a chip or pick up a knife, write down two things: the exact board model and revision, usually printed on the board itself, and the BIOS version shown on the boot screen or in the Mainboard tab of CPU-Z. Everything on page 2 starts from those two lines.

Marek writes the socket-mod and Xeon pages. He likes boards with too many jumpers, keeps a drawer of LGA 775 chips sorted by stepping, and reads Intel spec updates the way other people read box scores.